
Last Updated on May 10, 2021 by Dan
If you’re a scuba diver, one of the most important things you’ll need to know is how to test your own scuba tank. This post will take you through 12 steps that will help keep your tank in good shape and ready for the next dive!
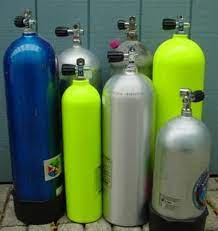
Steps for Testing a Scuba Tank
Step 1: Read the manual of your tank and be aware of all possible risks before diving into any adventure
Step 2: Inspect the date on your own scuba gear, valves and hoses for replacement or repair dates as suggested by manufacturer guidelines from time to time
Step 3: Find a place with calm waters so you can fill up without being interrupted
Step 4: Put on protective equipment like gloves, boots, mask and snorkel
Step 5: Open your tank valve wide and unscrew any regulator connection to release all air from inside, then put back together again. This is done in case there are any leaks that need immediate fixing- if not tightened correctly they could cause an
Step 6: Check the tank for any damage. Clear it with your instructor or dive buddy before diving if there is any doubt about whether it’s safe to use.
Step 7: Fill up the scuba tank and check its weight on a scale, which should be displayed in pounds (lbs) at the bottom of one foot (ft). The air pressure gauge will also have readings from 0-8000 psi (pounds per square inch), which indicates how much gas is inside the tank–when this number reaches 5000 psi you need to add more compressed gas soon! This can be done through an adapter that screws into your regulator so you don’t have to remove all of your equipment every time.
After taking off all breathing equipment, hold the tank upright and unscrew the cap slowly to allow air out.
Step 8: Check for any leaks in the valve or on its connections.
If you can’t find a leak, try tightening your regulator hose by turning it clockwise (right). If this doesn’t work, turn anti-clockwise (left) until it does–don’t force anything or do this very often because you could damage either of these parts!
Next check all fittings with another diver’s equipment that is identical to yours – if there are no differences then everything should be okay!
Now fill up your BCD and go dive again 🙂
Step 9: Fill up an empty scuba tank with water from a bucket and place it on the ground.
Step 10: Open your tank valve wide and unscrew any regulator connection to release all air from inside, then put back together again.
Step 11: Fill up with water by pressing down until you feel a slight vacuum caused by a change in pressure – this means that your tank is completely filled!
Step 12:Test for leaks and tighten connections if needed as before, but do not overfill or experience damage of some sort like an explosion! And lastly check for weights–notice how they may be lighter now? 🙂
If everything goes well without failures then congratulations on getting ready to dive again! Now go find new adventures underwater 😉